Tuesday, June 12, 2012

"Flower Cake"


This cake is perfect for any girly celebration. I have made this petals out of tissue paper.

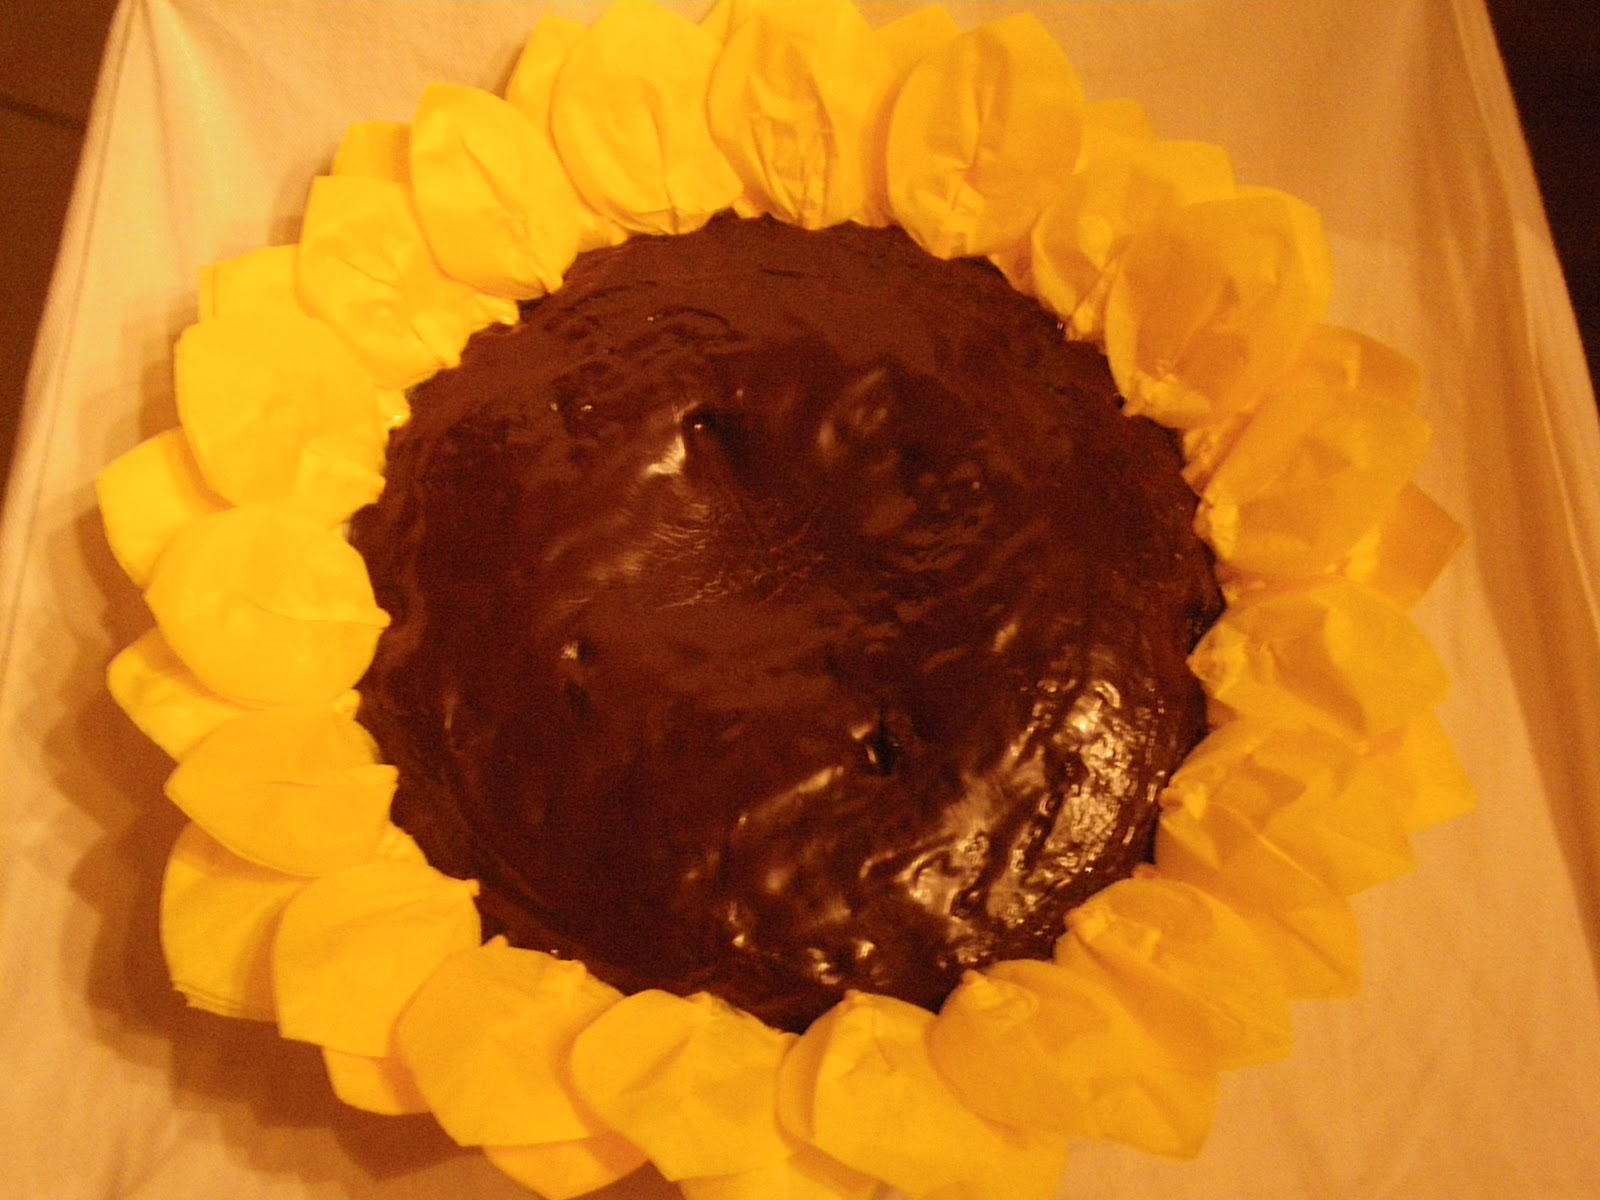
The Sunflower cake, were a hit at a Mother's Day bake sale. You can have fun with the colors.

By the time this cake was ready, it had to go...no time for final picture!
***      ***
It must have 2 rows of petals...here is what you need to make your flower petals.


Place the petals at the top edge of your cake, than start the second row in between petals ...see the picture.


And the result a beautiful Flower cake!


Enjoy!!!


Saturday, May 26, 2012

Fish Bow Centerpiece

I am working on a centerpiece for Mops coming year...not quiet done, yet!

So far let me share, what I have worked on...


Here is the close-up of my low maintenance fishes :)

I will be posting the tutorial, when I am done.

Saturday, April 28, 2012

Easy Centerpiece

Pom-Pom Centerpiece


As I am preparing to do centerpieces for our Women's Ministry Event at Church. It's a pom-pom explosion...yet very girly, don't you think?

The plan was to prepare for 12 tables and 3 pieces for the food table ( I decided to do a topiary for it). Holding the big Pom-Pom I recycled the some roll of wrapping paper insert. " Be creative with stuff you have around the house".


For this project I used LOTS of tissue paper, as you can see it!
Cylinders vases, blk/wte floral scrapbook paper, ribbon and double sided tape.

First the idea of the decorated vases was taking from pinterest, i just changed a bit! Make your self a cup of tea or coffee :) and start making your pom-pom.

I made a scallop tag table numbers that hangs from the bottom of the pom-pom. Inside of the vase will be a "Battery Operated tea light".


Here are the pictures of the event decorations. Hope you can be inspired to do your own. Have fun!!


The cost of this project, will be around $40. This is for a total of 15 centerpieces (including: vases, scrapbook paper and tissue paper).

Tuesday, February 28, 2012

Resurrection Easter Eggs


I started this project by decorating an egg carton and gluing some ribbon and embellishment, on top I add the eggs number with the corresponding bible verse for the day. You can be very creative with this...paint, decoupage, sticker, and so much more....

I purchase the colorful plastic eggs ( you could leave it the way they are), but I wanted a white realistic look, so I spray painted with white.

After they were well dried I numbered each one with a sharpie and added a ribbon loop (you don't have to do this, I just want to hang my eggs as we open it daily :)


Now is time to get your supplies to fill each egg as you tell the" Easter Story". There are so many ideas online, this is what I decided to use it.


1.  Palm Branch - Matt. 21:1-9                                                

2.  Coin - Matt .26:14-16

3.  Cup - Matt. 26:26-28

4.  Knotted Rope - Matt. 27:2

5.  Whip - John  19

6.  Crown of Thorns - Matt. 27

7.  Cross - John 19:16-18

8.  Nail - John 20:25b

9.  Spear - John 19:31-37

10.       Linen - Matt. 27:57

11.       Stone - Matt. 27:59-60

12.       Empty - Matt. 28:6


Friday, January 6, 2012

Candy Bouquet

Your favorite candies, beautifully arranged into bouquets! Custom made for any occasion.


Birthday Candy Bouquet


Teacher's Valentine Day Gift


Tuesday, October 11, 2011

Ornament Cupcakes


I love the way it turned out, very light weight.
 It will be so pretty on a sweet Chritmas tree.

Sunday, September 4, 2011

Utensil Holder Makeover

I love to play with texture and colors.... and for some reason I love brown and white combination.

One of my latested crafts was refinishing my old utensil holder. And that's what my finished makeover looks like.


I used:

my old utensil holder, you can use any pot or vase, that you have around your  house.

2 colors os Suede Lace, you can find at any craft store. (Michael's has a bigger roll of 25 yards). -- don't forget to use your coupon.

Glue, you can use hot glue, but for this project I use Weldbond.


How to do it:

Start from the bottom, gluing the first part of suede lace in place. Then keep gluing the lace all the way around.

 I just did the outside of it, but you could  finish your holder off by wrapping the lace around the inside, it’s up to you.

I love the simplicity of it. I had some left over lace and i decided to do some embellishment with it ( be creative!!).


 If i get tired of it, i just turn it around and have a simple look.


The natural white color of the suede is just so beautiful.

Have fun creating....I would love to see pics of your project.